DIY CRAFTS: HOST A CENTERPIECE PARTY

With Easter just days away, I've got a fun (and productive) party idea for a Girls Night In get-together. Why not host a DIY centerpiece party? Each year, a few weeks before Easter, I get lots of emails and questions about Easter decorations and tablesettings. Here's a party theme that will not only allow you to spend time with your friends, you can go home with a beautiful centerpiece... just in time for your Easter Sunday celebration. It's also a great party plan for that DIY bride or class reunion, too!

Get the girls together for a perfectly creative way to craft your own Easter centerpieces, party decorations for a class reunion, wedding or baby shower or even for that DIY bride.

Get the girls together for a perfectly creative way to craft your own Easter centerpieces, party decorations for a class reunion, wedding or baby shower or even for that DIY bride.

THE SET UP

This is a very simple party to host. You provides the drinks, the food, and a large workspace with plenty of room. Guests will bring what they need for her own centerpiece plus tools like floral wire, floral sheers, ribbon, etc. You can all share supplies. Ask guests to email a list of what they are bringing- you may need to make a trip to Michael's, Hobby Lobby or a local floral supply store to pick up the basics if you don't have them. NOTE: If you are planning this party for the week of Easter, you might also set up a station to dye Easter eggs. That way, you can have eggs already dyed for the kids to decorate.

Pick up plants and flowers from the garden center to create an Easter centerpiece you can plant and enjoy all summer.

Pick up plants and flowers from the garden center to create an Easter centerpiece you can plant and enjoy all summer.

In the Spring, I always like to use herbs or flowers from the garden center for my centerpieces... that way, after the party is over, I can plant them in the yard and enjoy them all summer long. I picked up a few bunches of tulips at the store, too. I got a twig wreath and some bird nests at the craft store and found floral foam, wire and twine there also. If you want a rustic look, use Mason jars in several sizes. If you are using metal containers, they tend to leak. To avoid this, fit a small jar or plastic container into the bottom and fill that with water. 

Cover your work space with a plastic backed drop cloth from the home improvement store or use brown craft paper... I used did both to make clean up easy. It is important to use layers of newspaper if you will be dying eggs; they make a mess and the stain is virtually impossible to remove.

Easter craft projects how to

FOOD & DRINKS

Girls Night is soooo about the cocktails and quality time catching up with friends but since this party is centered around an activity, I wanted to keep the menu very simple.

A cheese board with 3-4 cheeses plus crackers, fruit, honey, jam and other pairings is the perfect way to start the party. It is easy to assemble and there's no cooking required. Make one of your party favorites that is easy to eat standing up or while working. I made Puffy Party Squares because they are easy, fast and inexpensive but also because everyone loves them. You can also do some lovely egg salad sandwiches because you'll have a ton of eggs on hand.

Easter egg dying ideas
Pretty, colorful drinks and easy food make hosting duties simple!

Pretty, colorful drinks and easy food make hosting duties simple!

toasted egg salad sandwiches using hard boiled Easter eggs

THE ACTIVITY

Making centerpieces and decorating eggs can be as easy or as complex as your time and patience allow. If you look at Pinterest, you can see a million different ideas for every taste and every budget. I love the look of speckled eggs. Get the how to here... I'm a big fan of cheap that looks expensive so that's what I was aiming for with my flower arrangement. I also like the idea of repurposing the flowers in the garden or container after the party is over.

ideas for Easter centerpieces
egg cups hold pretty wildflowers from the yard

My own style is very relaxed and easy so my centerpieces tend to be rustic and take about 6 minutes to create. When making a centerpiece for a dinner table, I want it to be low so guests can see each other across the table. Here's what I came up with using annuals and one bunch of tulips. After Easter is over, I'll plant the annuals in containers to brighten up my deck this summer. 

Carefully wrap the root ball in plastic and keep the roots damp so you can plant and enjoy long after the party is over.

Carefully wrap the root ball in plastic and keep the roots damp so you can plant and enjoy long after the party is over.

Carefully remove the annuals from their plastic container, keeping the root ball intact. Put it into a plastic bag and secure with a rubber band. Use one plastic sandwich bag for each plant. Make sure the soil is damp- but not too wet. Arrange the flowers in a platter, basket, wreath or other short container. Add some fresh cut flowers also for a little height. Done!

This could even be a wonderful family get-together with the cousins or a fun annual neighborhood party. The adults can make flower arrangements and the kids can decorate eggs at a craft station set up with stickers, glitter, glue and other supplies.

Print Friendly and PDF

EASY ENTERTAINING: HOW TO MAKE A DEVILED EGG BAR

I love to set up interactive stations for easy entertaining. A self-serve DIY bar offers guests lots of options and encourages conversation, too. In my book, that is a win-win. For Easter brunch (or any brunch for that matter) a DIY Deviled Egg Bar is nothing but easy, yummy fun and with a price tag under ten cents per serving, deviled eggs are super affordable.

How to Make a Deviled Egg Bar

THE HOW-TO:

Make your deviled eggs. I'd suggest making a pretty basic recipe since your guests will be adding toppings and piling on lots of flavor. Try my classic deviled egg recipe... and learn all about the best way to hard-boil eggs here.

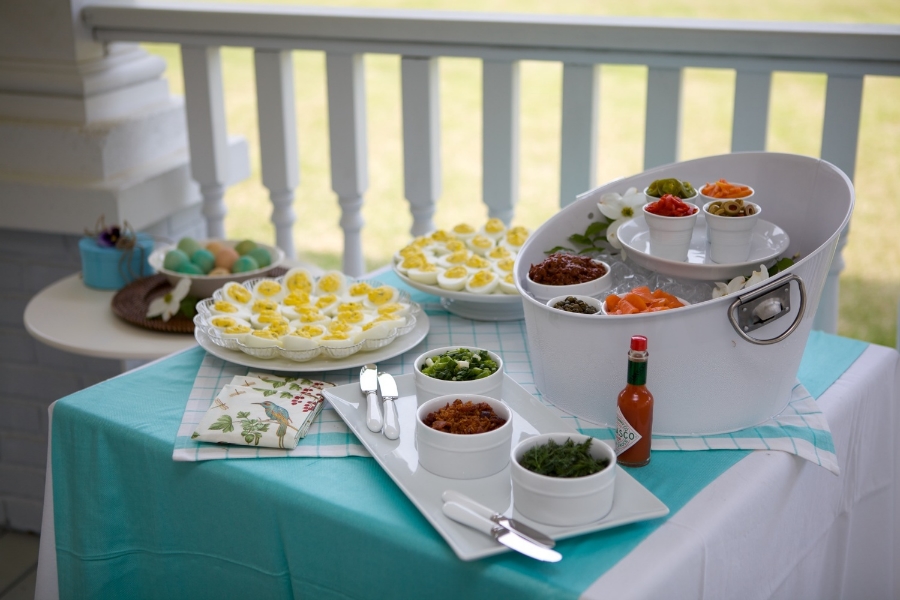
How to build a deviled egg bar with toppings. Photo: Arden Photography Location: The Sonnet House, Leeds, Alabama

How to build a deviled egg bar with toppings. Photo: Arden Photography Location: The Sonnet House, Leeds, Alabama

Assemble the eggs on a variety of different plates, egg dishes, and platters. Arrange the platters at different heights. Put the toppings in small dishes, jars, or bowls in groups. I like to get a bowl and fill it with ice and arrange bowls filled with toppings that are best kept chilled.  

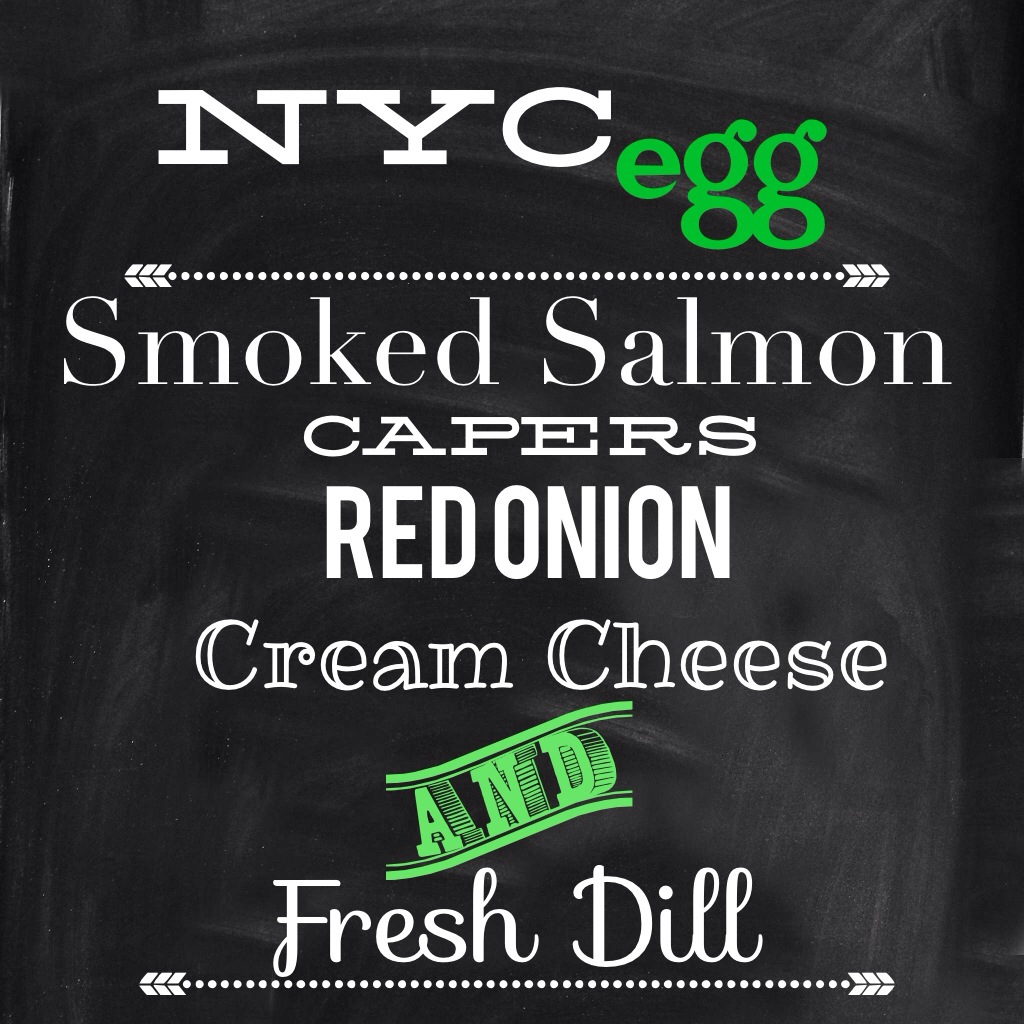
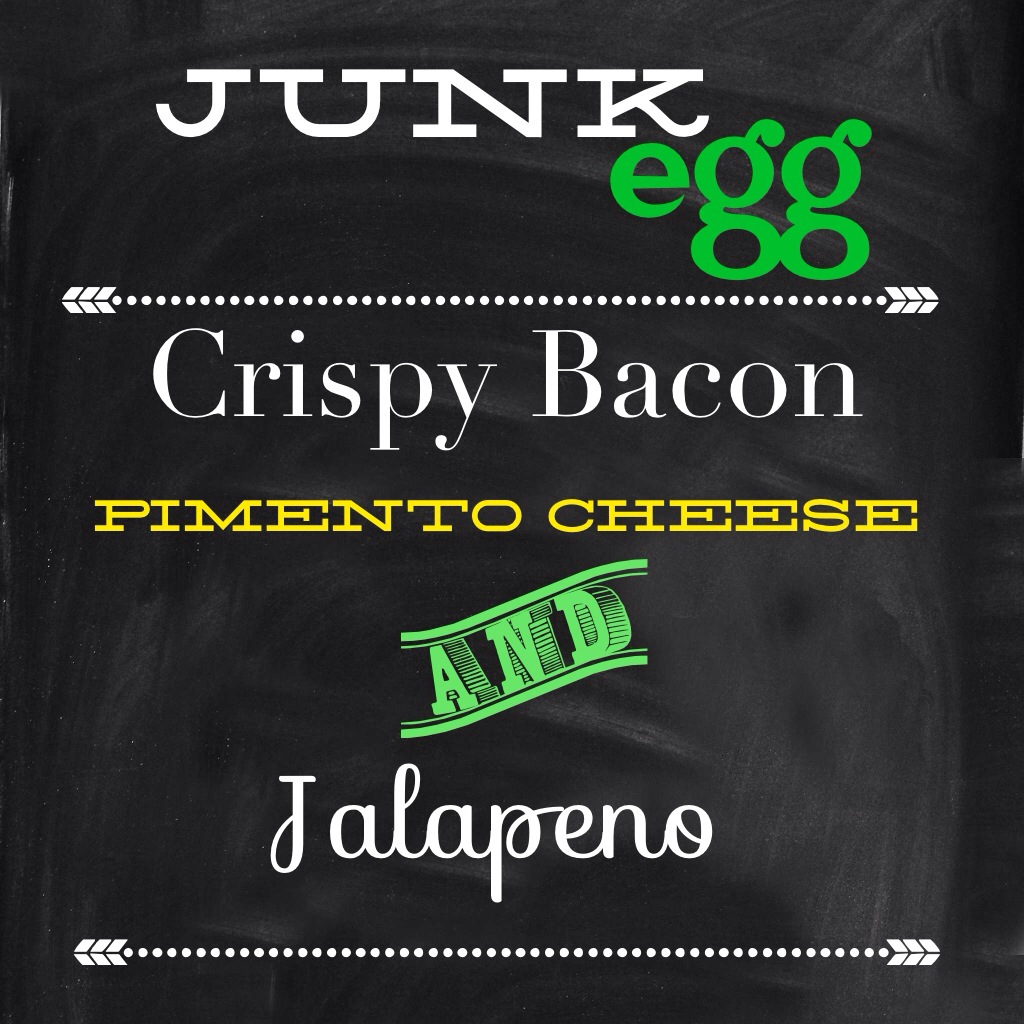
Offer guests a menu of different combinations: BBQ, Asian, etc, to help them craft their eggs.

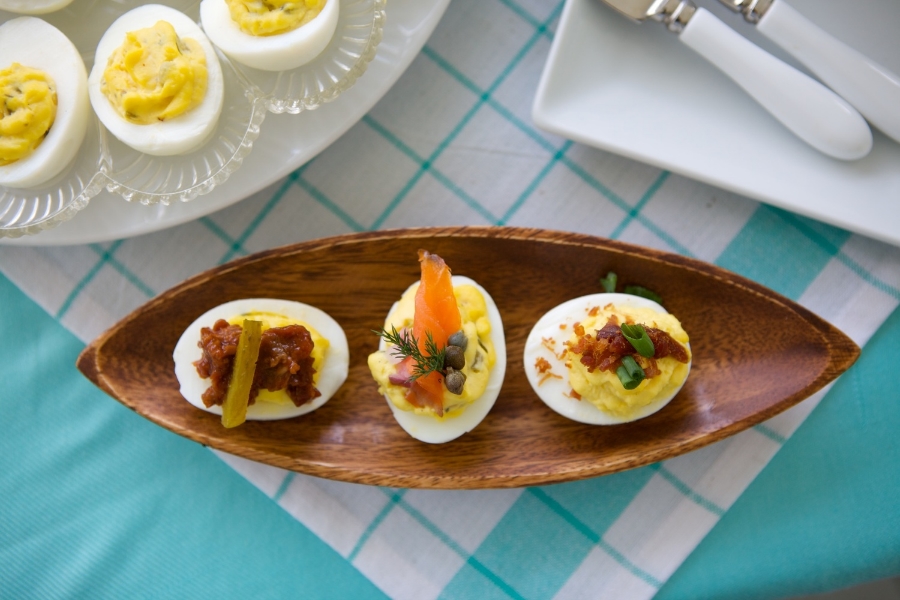
Deviled eggs with assorted toppings. Photo: Arden Photography

Deviled eggs with assorted toppings. Photo: Arden Photography

SUGGESTED TOPPINGS: Use as many or as few as you like based on your budget and the amount of room you have.

  • Herbs: Fresh Dill, Thyme, Tarragon, Chives, Italian parsley, or cilantro; finely chopped
  • Scallions, finely chopped
  • Capers
  • Spicy pickle relish
  • Pickled okra slices
  • Roasted red peppers, diced
  • Jalapeno peppers, diced
  • Green olives, sliced
  • Toasted pecans, chopped
  • Bacon crumbles
  • Goat cheese crumbles
  • Shredded cheddar cheese
  • Fresh horseradish
  • Country ham, sliced ultra thin and cut into small pieces
  • BBQ (beef or pork, shredded)
  • Smoked salmon (thin sliced)
  • Fresh lump crabmeat (cooked)
  • Cooked baby shrimp
  • Caviar (if you have the budget)
  • Sour cream, creme fraiche or Greek yogurt
  • Fig preserves
  • Chutney
  • Hot sauce
  • BBQ sauce
  • Salt
  • Pepper
  • Paprika
Print Friendly and PDF

HOW-TO TIPS: BEST WAY TO MAKE AND PEEL A HARD BOILED EGG

I’ve seen lots of posts on social media discussing how to make a perfect hard-boiled egg. None of them are the same. Most are similar but they all have their own twist or timing. I decided to do a hard-boiled egg study from some of the more prominent offerings on the Internet to see which hard-boiled egg is the best egg for those yummy deviled eggs.

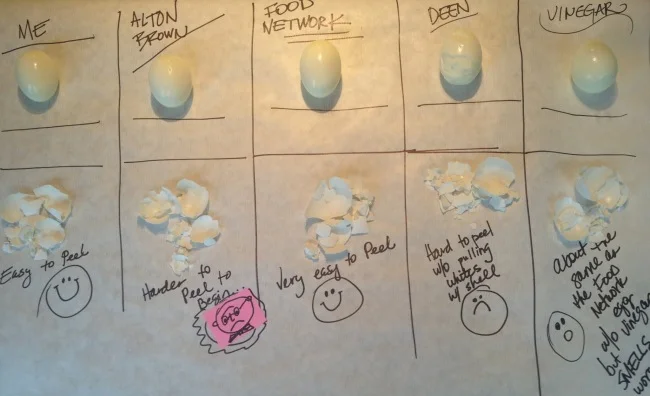
I compared hard-boiled egg cooking instructions from Julia Child, Alton Brown, Food Network, the Deen family, and the old school method of adding vinegar to the water to my own tried and true hard-boiled egg method. I also watched videos from Jacques Pepin and Food & Wine. The test was based on three criteria: texture of white, texture of yolk and ease of peeling. DISCLAIMER: This was not a blind taste test as I was the only person in the kitchen.

Hard boiled egg recipes: Which one is best? See tips and results below from five different methods.

Hard boiled egg recipes: Which one is best? See tips and results below from five different methods.

HERE'S WHAT I FOUND OUT: TIPS FOR COOKING THE PERFECT HARD-BOILED EGG

  • Farm eggs are harder to peel after boiling. Save your farm eggs for baking or ice cream. Fresh eggs from the store have thinner membranes which do peel easier so hard-boil super fresh eggs.

  • Don't use a non-stick pan for boiling eggs.

  • Do not cram too many eggs into a pot. You want to cover the eggs with one inch of water and leave room in the pot so you can stir the eggs around as they cook.

  • Stirring the eggs occasionally during the cooking process helps yolks stay centered and the whites have two sides which are equally thick; better for stuffing and not lopsided.

  • Use room temperature eggs and water or cold water and cold eggs. The result is about the same but eggs will crack more often if you add cold eggs to hot water.

  • You can peel the eggs easier if you run them under cool water or put them in an ice bath for 2-3 minutes only. Alton suggests 5 minutes in the ice bath but those were slightly harder to peel. I prefer to quickly rinse in cool water just until you can handle them. Crack and put back in the water; peel quickly by popping the large end with the air pocket on the counter-it seems to make the peel come off in larger pieces.

  • Some people suggest rolling the egg on the counter using the palm of your hand to crack the peel but I found all of those little pieces harder to peel. I used to do this but now prefer the "pop the air pocket" method.

  • Adding salt, vinegar or baking soda in the water does not make the peeling process easier and when you boil the eggs with vinegar, the whole house stinks.

  • The egg whites will become tough and rubbery if you cook more than the recommended time- you will not want to eat rubbery eggs ever again once you’ve had a properly cooked egg.

  • The ucky green ring around the outside is truly caused by overcooking and no other reason. The longer you cook the egg, the darker that outer ring becomes.

  • A soft or medium boiled egg yolk does not work as well for deviled eggs. The yolk was a little gummy when mixed with mayonnaise, etc. for the filling. However, the medium boiled egg (Alton Brown’s egg) was very delicious with just salt and pepper.

THE RESULTS: The Food Network method for hard-boiled eggs seemed to work the best because they peeled easier and had a better texture than the other versions but only slightly better than my own method. The instructions did not say how long to keep the egg in the ice bath so I left it in for 2 minutes. Follow the cooking instructions for the hard-boiled egg if you want to make deviled eggs. Here's the link...

My own cooking method worked just fine… tried and true. It was the runner-up to the Food Network method, but only because their method did peel slightly easier. Here's what I do:

Start with cold eggs; add tepid/lukewarm water to the pot, covering eggs by one inch. Stirring the water occasionally, bring the water to a just to a boil over high heat. Reduce the heat to medium high. Set your timer and boil for 5 minutes for large eggs, 4 minutes for medium eggs and 6 minutes for extra large eggs. Continue to stir them occasionally to keep the yolk centered.

When your timer goes off, remove from the heat and let them stand. Set a timer for 4-5-6 minutes- the same time you boiled the egg.

Once the timer goes off, immediately rinse in cold water until the eggs are just cool enough to handle. Pop each one- the larger side where the air pocket is- on the counter and put back in the water, working quickly to peel the eggs while they are still warm. Here's my deviled egg recipe. You'll love it.

Alton Brown’s method for hard-boiled eggs resulted in a medium/slightly undercooked yolk which tasted good but were not great for making deviled eggs. I could not find a link online but here's what Alton said about hard-boiled eggs on Twitter...

Alton Brown's hard boiled egg tips plus his method for oven cooked eggs.

Alton Brown's hard boiled egg tips plus his method for oven cooked eggs.

THIS JUST IN: ALTON BROWN'S GONE CRAY-CRAY. His words, not mine. Just hours after I posted this comparison, my former mentor has upped the ante and posted a game-changer... he's now suggesting that baking the eggs in the oven is more reliable and easier than "the harsh environment of a pot of boiling water" - SO I had to test that for myself. I found the technique to be more difficult as I had two escapee eggs jump off the towel and onto my floor. However, the result is equally delicious as his boiled version above but again, a little underdone for my preference for hard-boiled eggs for stuffing. Additionally, the egg yolks settle to the bottom of the egg making a very thin cup, not so great for stuffing. There was a video with instructions but he pulled it down.

UPDATE 2: Now, AB says you should cook your eggs in a pressure cooker! I'm going to skip that one but if you are curious, here's the link to Alton Brown's Eggs Under Pressure blog post.

Jamie Deen's method resulted in the worst results. They tasted fine but were harder to peel and egg white came away with the peel creating big “potholes” in the egg white; pretty unattractive for deviled eggs. So many people looked at the video today that they crashed the site. I'll add a link for you to see it later but basically Jamie said to bring the room temperature eggs to a boil in salted water. Remove from the heat and add a lid and wait 13 minutes. Put in an ice bath. Here's a link to Paula's site with their own test kitchen results. Read more... Paula's method is the same as Jamie's but she lets the eggs sit for 20 minutes which I found way too long and produced rubbery egg whites.

The Julia Child hard-boiled egg method took too long compared to the others and didn’t taste better so I scratched it from the test. Her former assistant and one of my favorite chefs, the legendary Jacques Pepin suggests to prick the egg with a pin before boiling. Watch Jacque's charming how-to properly boil and peel a hard boiled egg video here...

PEELING A HARD BOILED EGG: I did find something completely new when it comes to peeling a hard-boiled egg: using a teaspoon between the membrane skin and the egg as shown in this Food & Wine video from Justin Chapple from their test kitchen. I tried it and found it harder than just peeling it the classic way. Sorry, Justin. What is it with these quirky guys named Justin?